
Navigation: WP Admin > License Server > Settings > Setup Wizard (button in the Settings header)
The setup wizard configures the essential settings so you can start selling and managing software licenses. There are two wizards:
| Wizard | URL | Purpose |
|---|---|---|
| Basic | wp-admin/admin.php?page=slswc-setup-wizard | Plugin license, license behavior and support settings. |
| Advanced | wp-admin/admin.php?page=slswc-advanced-wizard | License key format, Downloads API and Composer repository. |
Both are hidden admin pages that need the manage_options capability.
When the Wizard Runs
- After activation: the first time you load the admin after activating the plugin (within 60 seconds), you are redirected to the basic wizard. The redirect happens only once, and is skipped if the wizard was already completed or you are in the network admin.
- Any time: click the Setup Wizard button at the top of
WP Admin > License Server > Settingsto run it again.
The wizard is marked as complete (option slswc_wizard_completed) when you reach the Done step of the basic wizard. Skip setup (top right), Skip wizard (next to each step's button) and the Esc key all jump straight to the Done step, which also marks the wizard complete.
Basic Wizard
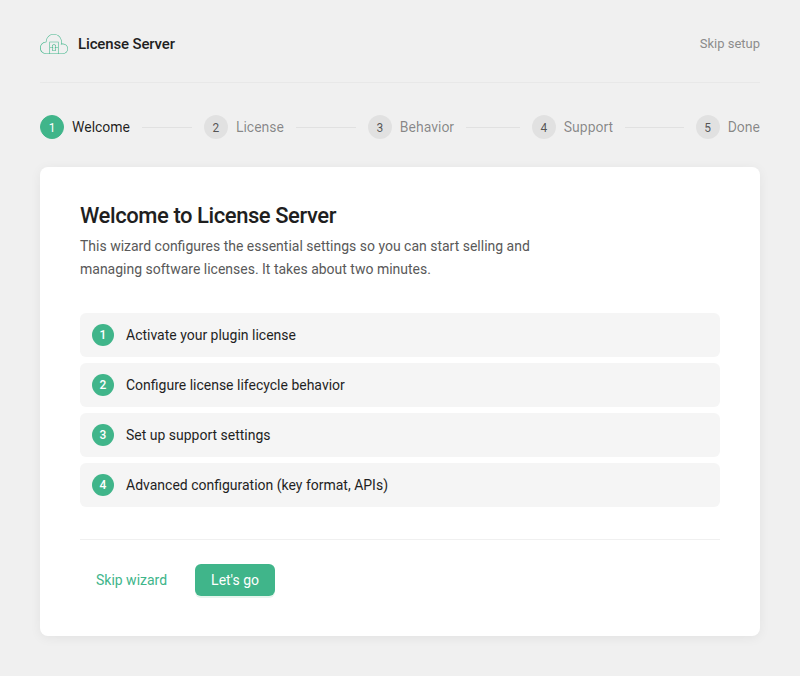
Step 1: Welcome
An overview of what the wizard sets up. Click Let's go to start.
Step 2: License
Enter your License Key to activate the plugin's own license. This is the same as WP Admin > License Server > Settings > Activation (see Activation). Leave it blank to skip this step.
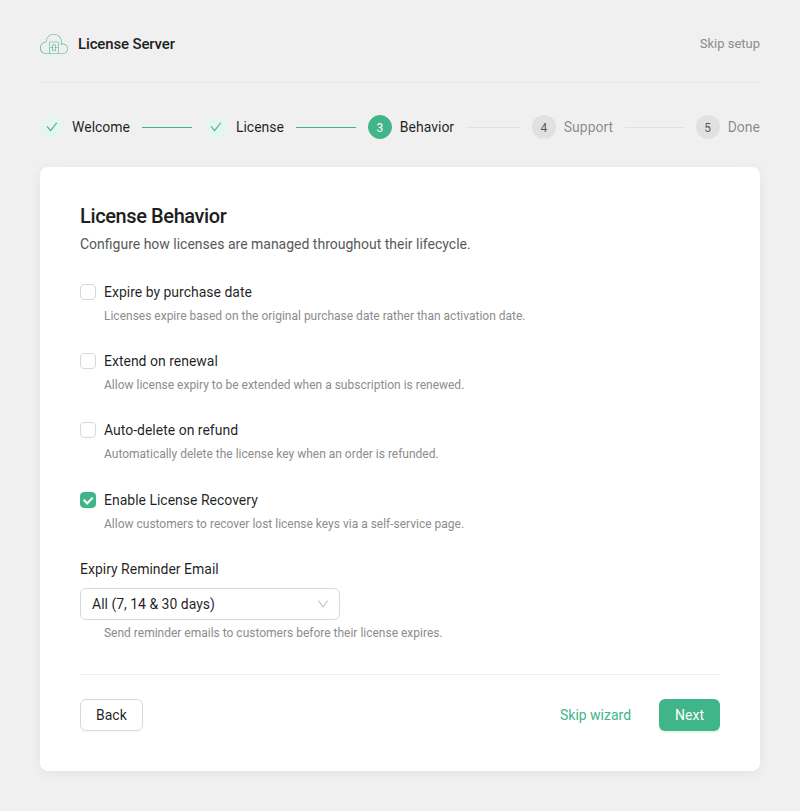
Step 3: Behavior
License lifecycle options. These are the same options as Settings > General.
| Option | Description |
|---|---|
| Expire by purchase date | Licenses expire based on the original purchase date rather than the activation date. |
| Extend on renewal | Allow license expiry to be extended when a subscription is renewed. |
| Auto-delete on refund | Delete the license keys when an order is fully refunded. |
| Enable License Recovery | Let customers recover lost license keys on a self-service page. On by default. |
| Expiry Reminder Email | Send reminder emails before a license expires: None, 7 days before, 14 days before, 30 days before, or All (7, 14 & 30 days). |
Step 4: Support
Support system options. These are the same options as Settings > Support.
| Option | Description |
|---|---|
| Notification Email | Receives an email when customers open new support tickets. Defaults to the site admin email. |
| Enable public support (no login required) | Allow customers to submit tickets without an account. |
| License Key Requirement | Optional or Required: whether a license key must be provided when opening a ticket. |
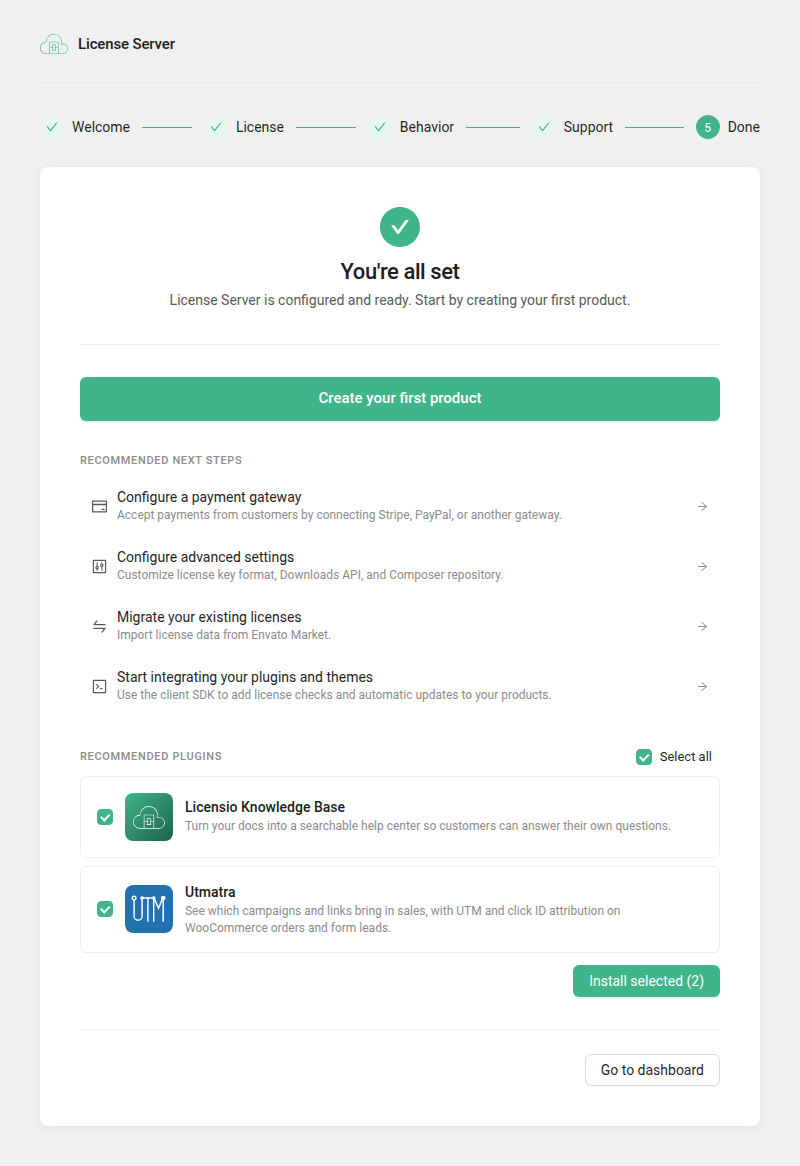
Step 5: Done
The You're all set screen. Click Create your first product to open a new product, or pick one of the Recommended next steps:
- Configure a payment gateway — opens
WP Admin > WooCommerce > Settings > Payments. - Configure advanced settings — opens the advanced wizard.
- Migrate your existing licenses — shown only when data from another licensing plugin is detected. Opens Settings > Migrations.
- Start integrating your plugins and themes — opens the client SDK documentation.
Below these are the Recommended plugins, and a Go to dashboard button.
Advanced Wizard
Open it from Configure advanced settings on the Done step, or go to wp-admin/admin.php?page=slswc-advanced-wizard.
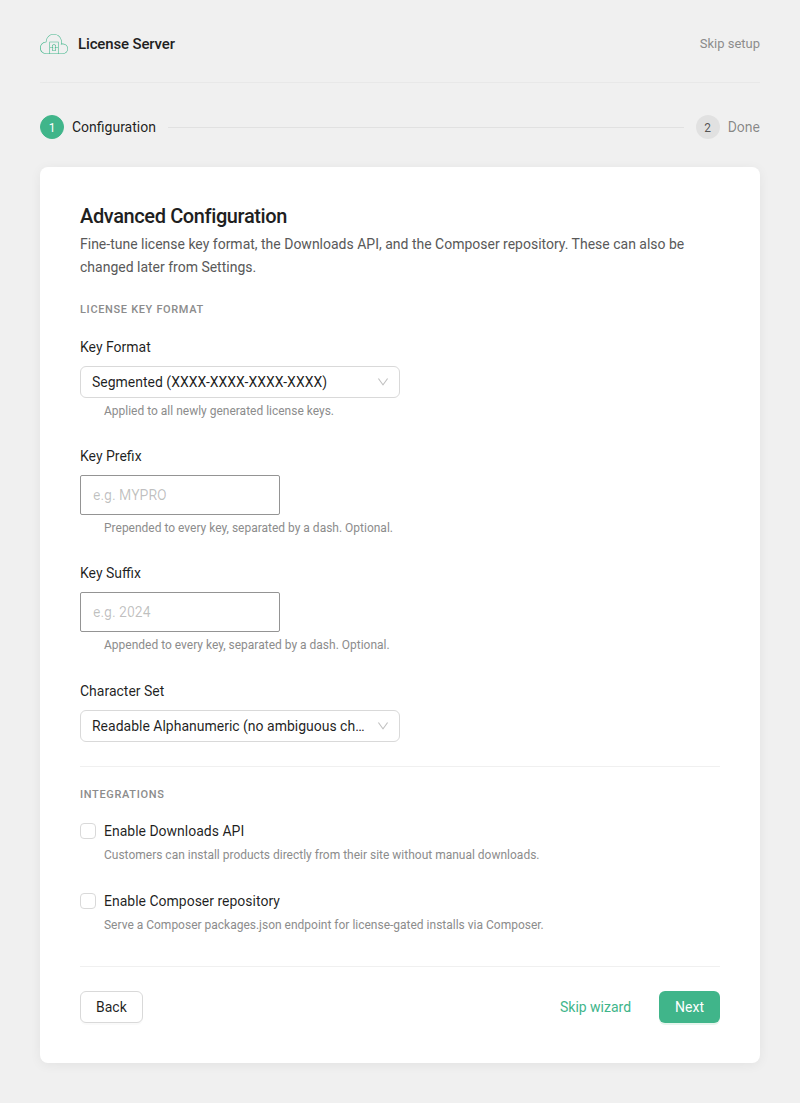
Step 1: Configuration
| Option | Description |
|---|---|
| Key Format | Segmented (XXXX-XXXX-XXXX-XXXX), Classic Hash (40-character hex string), Compact (XXXXXX-XXXXXX) or Extended (XXXXXX-XXXXXX-XXXXXX-XXXXXX). Applies to newly generated keys. |
| Key Prefix | Optional text added before every key, separated by a dash. |
| Key Suffix | Optional text added after every key, separated by a dash. |
| Character Set | Readable Alphanumeric (no ambiguous characters), Alphanumeric, Hexadecimal, or Uppercase + Numbers. |
| Enable Downloads API | Customers can install products directly from their site without manual downloads. |
| Enable Composer repository | Serve a Composer packages.json endpoint for license-gated installs. |
| Composer vendor name | Shown when the Composer repository is enabled. The vendor prefix for package names, e.g. my-company/plugin-slug. |
These are the same options as Settings > Key Generator and Settings > Advanced.
Step 2: Done
Click Go to settings or Go to dashboard. The Recommended plugins are shown here too.
Recommended Plugins
Both Done steps suggest companion plugins you can install in one click:
| Plugin | Requires |
|---|---|
| Licensio Knowledge Base | PHP 7.4, WordPress 6.4 |
| Utmatra | PHP 8.0, WordPress 6.9 |
How it works:
- The section is shown only to users who can install and activate plugins. Plugins that are already active are always shown, with an Active ✓ tag and a Go to … link.
- Plugins that can be installed start ticked. Select all appears when there are two or more.
- Install selected (N) installs and activates the ticked plugins one after another, with progress on each card. If one fails, the rest still install.
- A plugin your site can't run shows a disabled checkbox and the reason, for example "Requires PHP 8.0 or later."
- If an install fails, the card shows the error and a link to install the plugin from the Plugins screen instead. This is also what you see when your host needs FTP or SSH details to install plugins.
Tip: Developers can change the list with the
slswc_recommended_pluginsfilter. See the Hooks Reference and thePOST /installendpoint.