License editing
As the website administrator, you can edit existing licenses on the Licenses page found under WooCommerce on the WordPress admin dashboard. To edit a license, follow the following steps.
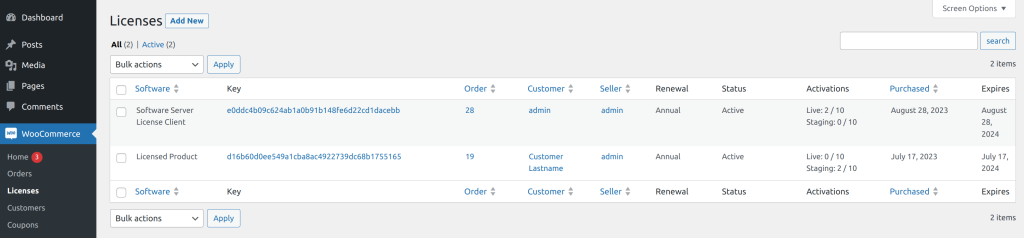
With an administrator account, log in and go to WooCommerce > Licenses on the WordPress dashboard. You should see a list of licenses as shown in the screenshot below.
View License Details
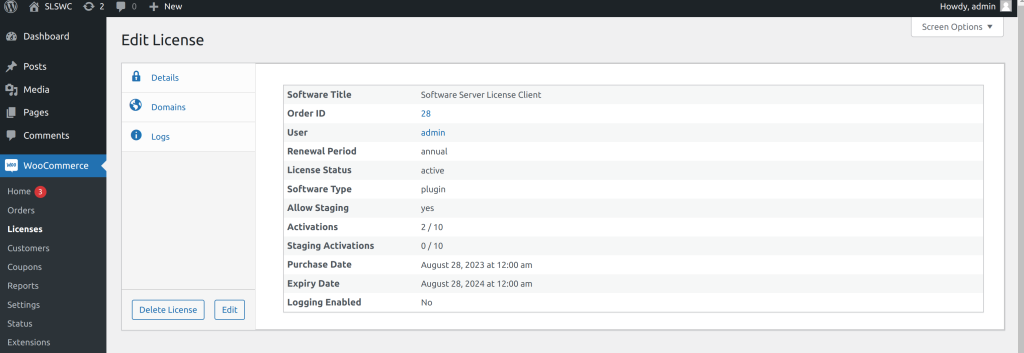
Select the license you wish to edit by clicking on the license key under the ‘Key’ column and you should be shown the license details like on the screenshot below:
Edit license details
In order to edit the license details, click on the ‘Edit’ button. After clicking the ‘Edit’ button, you should see the license editing fields where you can select or type your details.
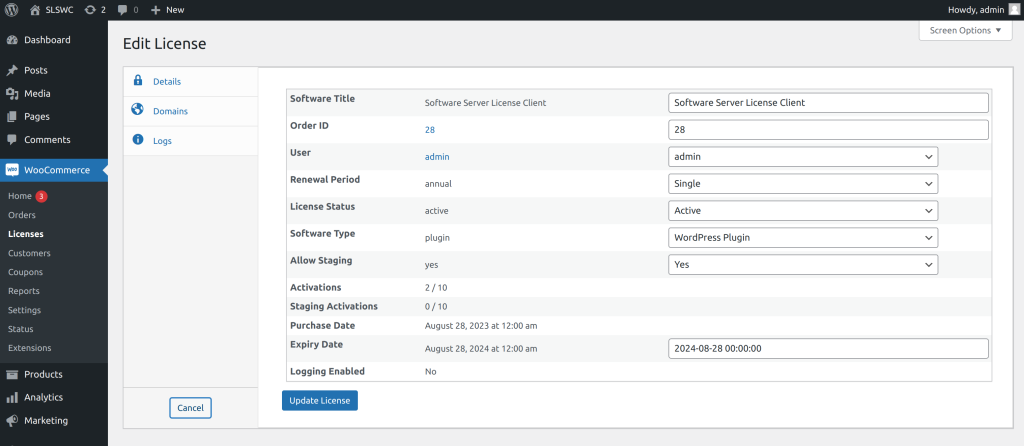
Add all the software details as detailed in the Software Product Creation article. Once you have edited the information, click on the ‘Update License’ button to save the changes or click the ‘Cancel’ button to discard the changes.
Adding domains
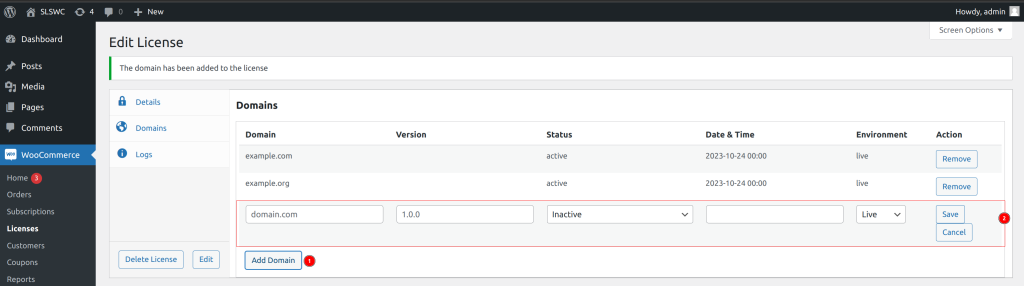
You can add or activate domains for the license manually by adding the domain in the Domains section on the license edit screen.
To add a domain, firstly, click on the ‘Add Domain’ button to show the domain fields and then type or paste the domain, and the version, select the domain status, activation date, and environment then click on the ‘Save’ button. After clicking the ‘Save’ button, the domain should be listed on the domains list.
Logs
The logs for the license are shown in the Logs section on the license editing screen. The logs show information from the time the license key was created and show activation, deactivation, and other key information.