Admin Settings
It is recommended that you check the settings page available under the ‘WooCommerce > Settings > License Server’ settings page. The plugin should work without issues with the default settings but you may like to customize it to suit your needs.
Once you open the page ‘WooCommerce > Settings > License Server’, you should see a General and Tools tab. You should enable what you need or keep the settings as they are. Here is an overview of what these settings are used for.
General Settings
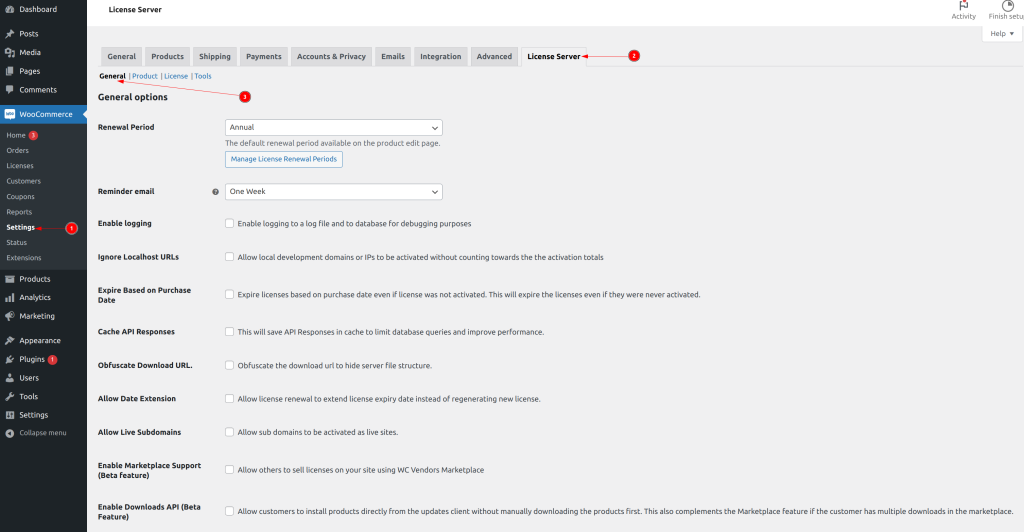
Renewal Period – is the default renewal period that will be set for new products. It is for specifying how frequently the license will expire. Available options are Annually, Quarterly, Monthly and Lifetime. So for example, select Monthly if you want licenses to be renewed Monthly.
Reminder Email – Specify the number of weeks before licenses expire to send the license expiry email to the customer. Example: Select ‘One Week’ to send an email to customers ‘one week’ before the license expires.
Enable Logging – Keep a log of all license activity in a file or in a database. This will help in troubleshooting license issues.
Expire Based on Purchase Date – This will expire licenses based on the date of purchase instead of the activation date. This will compare license duration and license purchase date to determine if the license should be expired, this means a license will expire even if it was not activated.
Cache API Responses – API Requests will be cached to improve server performance.
Obfuscate Download URL – Enable this to hide the underlying WooCommerce downloads file structure. Enabling this will change the download URLs sent to clients to hide the underlying file structure.
Allow Date Extension – Enable this to allow licenses to be renewed by extending the expiry date instead of renewing a subscription. This will add new buttons to renew licenses on the ‘My Account’ page for customers and new order actions to ‘Extend Expiry’ in order actions.
Allow Live Subdomains – Enable this to allow customers to activate their license keys on subdomains.
Enable Marketplace Support (Beta Feature) – Allow others to sell their products on your site using WC Vendors Marketplace plugin
Enable Extensions (Beta Feature) – Allows you to extend the functionality of the License Server plugin using extensions.
Delete refunded license – Delete the license keys associated with a refunded order.
Managing custom renewal periods
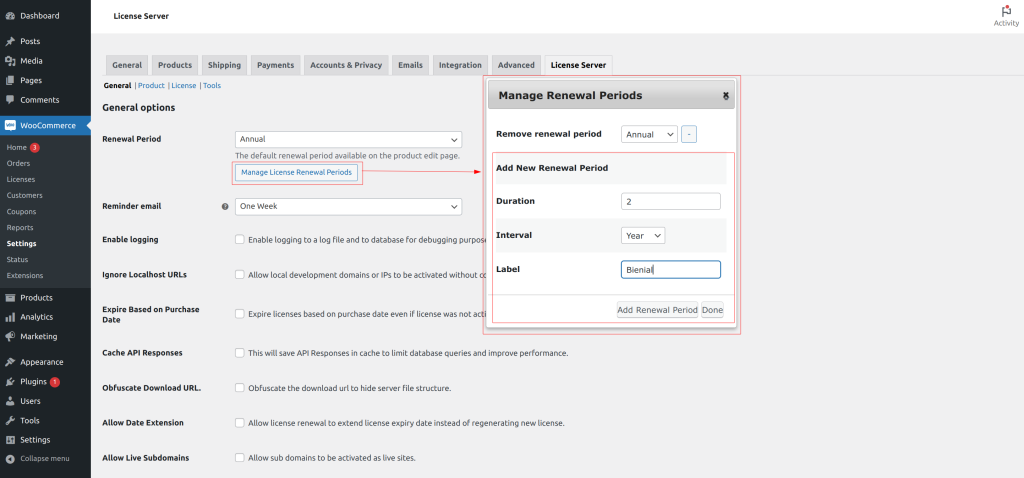
By default, the plugin comes with Monthly, Quarterly, Annual and Lifetime as the default renewal periods. The License Server for WooCommerce plugin will work out of the box with these default renewal periods but there is an option to define your own renewal periods. To do so, click on the ‘Manage License Renewal Periods’ button located under the ‘Renewal Period’ dropdown in general settings. Once you click on this, a popover will appear with a form to remove or add new renewal periods as you wish.
To remove a renewal period, first select it from the dropdown labelled ‘Remove renewal period‘ then click the ‘-‘ button on the right of the drop-down menu, repeat for all the options you wish to remove then click ‘Done’ and save the settings by clicking the ‘Save Settings’ button at the bottom of the page.
To add more renewal periods, first click on the ‘Manage License Renewal Periods’ button to reveal the form. Specify the duration, interval and label for your new renewal period. For example, in the screenshot we have
Duration = 2,
Interval = Year
Label = Biennially
This adds a new option to renew licenses every two years. Once you have specified your details, click ‘Add License Type’. Repeat this for all the license types you wish to add and click ‘Done’, finally save the settings by clicking the ‘Save Settings’ page.
Note: The ‘Done’ button does not save your settings it only closes the popup. Always remember to save the settings by clicking the ‘Save Settings’ button at the bottom of the page otherwise changes will be lost if you navigate away from the page.
Product Settings
You can control whether to hide or show software information on single product pages on the front end by modifying the product settings in ‘WooCommerce > Settings > License Server > Product’. You can choose whether to hide all software information or to hide only specific tabs.
Here is what each of the options do.
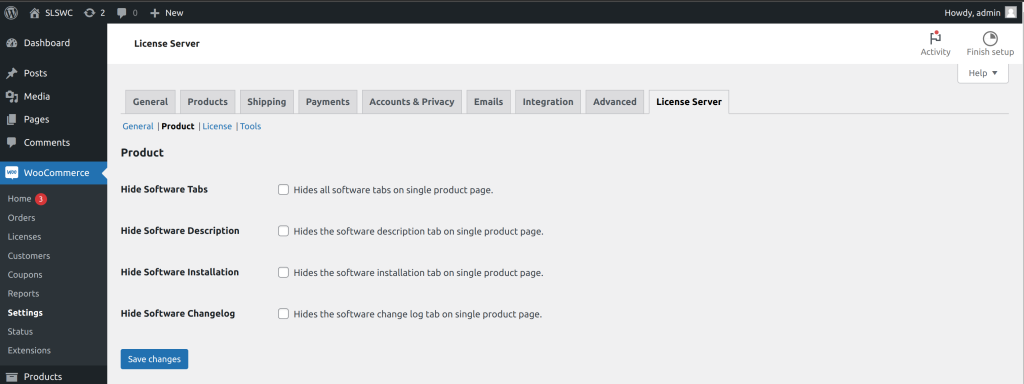
| Hide Software Tabs | Check to hide all software tabs in single product page in front end. If this is checked, all software tabs will be hidden in the single product page and all other options below will not apply. |
| Hide Software Description | Check to hide the software description tab on single product page. |
| Hide Software Installation | Check to hide the software installation instructions tab on single product page. |
| Hide Software Changelog | Check to hide the software changelog tab on single product page |
Once you have selected your preferred options, click the ‘Save Changes’ button to save your settings.
License
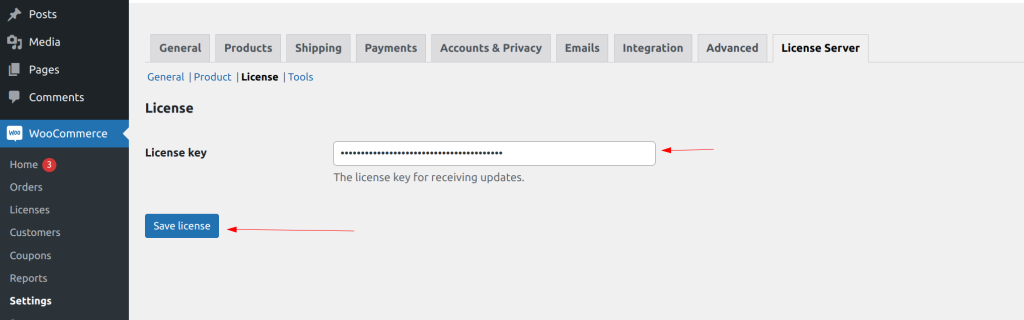
The license section provides an interface for admins to activate the license key for the plugin.
To activate the license, simply go to the WooCommerce > Settings > License Server settings page and click on the License section.
On this page, type or paste your license and click on the ‘Sav license’ button.
Tools
The tools sections provides tools for administrators to troubleshoot certain issues related to previous versions of the plugin and also a tool to import licenses from other systems.
Refer to the tools article for more