Software Product Creation
Once all settings have been reviewed or changed, products must be added and the proper attributes are specified to start selling the products as software.
You can add plugins and themes to the License Server by first creating WooCommerce Products and then choosing the option to mark the product as Software and then add the proper software attributes. To do this, Go to your WordPress dashboard and click on ‘Products > Add New’ to create a new product. On the ‘Add new product’ page that will open up, type in the product details as you would for any WooCommerce product as follows:
Product Basic Details
1. Product title – This is the name of the product and it will be visible in your store listing
2. Product slug – This is the product slug, it is used in a single product URL and also used by the License Client to check for the software’s public information. (ex. purchase-license-server-for-woocommerce)
2. Description / Product Short Description – Describe the product. The description will also be visible on your product page.
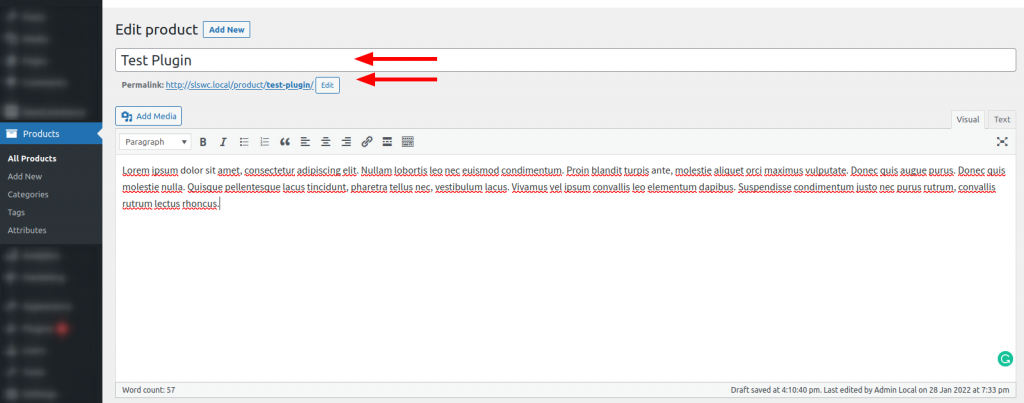
Please refer to the screenshot below for a sample setup.
Software Downloads
Under the ‘Product data’ section choose the type of product this is, choose ‘Simple product’ if you will define one price for the software, or choose ‘Variable product’ if you wish to offer multiple pricing options for the product.
Download limit – If you want to limit the number of times the customer can download the files, specify the number in the ‘Download limit’ field. Please note that this will also limit updates, so if they reach the download limit and try to update the plugin/theme on their website, this limit will be in effect and the update will fail.
Download expiry – The download expiry limits the number of days the generated download link will be valid for.
Software Type – Choose the license type for this product.
License Details
To specify the License details, first, check the ‘Software License’ checkbox to specify that this product is software. This will reveal a new tab titled ‘License’ for you to add the software and licensing details.
Click on the ‘License’ tab to start filling in the software details like in the screenshots below for reference


Some of the fields are optional and some are required, but we recommend you fill all the fields to have full control of how the licenses are served. Please refer to the table below for the description of the fields and to see which ones are required and which ones are optional.
Table 1: Software attribute description:
| Field Label | Required | Description |
|---|---|---|
| Software Type | required | The type of software product this is. Available options are WordPress Plugin, WordPress Theme, or Other, defaults to WordPress Plugin. |
| Allow Staging | optional | Where licenses associated with this product will be allowed activation on staging sites or not. Yes, or No, defaults to Yes. |
| Software Slug | required | The slug of the software. must be unique and similar to the slug generated from the product title. (ex. purchase-license-server-for-woocommerce) |
| Software Version | required | The current version of the software. Updates will be checked against this version and must be changed each time an updated version of the software is uploaded. |
| Software Author | required | The name of the person or entity that developed the software. |
| Requires WP Version | required | The minimum version of WordPress is required for the plugin/theme to function properly. |
| Compatible up to | required | The maximum version of WordPress this plugin/theme is compatible with. |
| Last Updated | required | The date on which the plugin/theme was last updated. |
| Activation Limit | required | The number of times this plugin/theme can be activated on a live site. |
| Staging Activation Limit | optional | The number of times this plugin/theme can be activated on a staging site. |
| Documentation Link | optional | A link to the plugin/theme’s documentation |
| Description | optional | The type of software product this is. Available options are WordPress Plugin, WordPress Theme, or Other, which defaults to WordPress Plugin. |
| Changelog | required | The software changelog. Show what has changed in each version of the plugin/theme |
| Installation | required | Instructions on how to install the plugin/theme |
| Banner High | optional | High-resolution banner image for the plugin/theme. |
| Banner Low | optional | Low-Resolution banner image for the plugin/theme |
| Update File | required | The downloadable zip file will serve as the update for this software. See the section below for more details about this field. |
More about the software update file
The update file is a required file that will serve as a downloadable update file for the software. A valid zip file must be provided by choosing a file from the WordPress media library or by pasting/typing the file’s URL and name in the corresponding fields. In order to specify the software update file for a product, you must be on the product edit screen, on the License panel, then do the following:
- Scroll to the bottom of the License panel section, and click the ‘Choose file’ button to open the media library
- On the popup titled ‘Media Library’ do one of the following:
- If the file is already uploaded: Click the ‘Media Library’ tab if you already have the file uploaded, click the file to choose it from the list and move to step 3 below
- If the file is not yet uploaded: Click on the ‘Upload files’ tab, then click ‘Select files’, browse and locate the file in your computer’s file explorer to open and upload the file to the Media Library, once the upload finished, make sure the file is selected the follow step 3 below
- Once you have located the file in the library, make sure it is selected and then click the ‘Select’ button at the bottom of the popup. This will insert the file URL and name in the corresponding fields for the update file. You may edit the file name if required
- Click on ‘Update’ or ‘Publish’ to save the product

Saving the product will add the selected file to the Downloadable Files section under the Product’s General tab. This is required since this download will also be served by WooCommerce and will also be available on the customer’s downloads page if they wish to download it manually.
Provide updates for the software
To mark that a new version is available for the product, you have to edit the product and specify a new version that is higher than the current version, then specify a new update file with a URL that is different from the current update file. If the update file URL is the same as the previous one, the current file will continue to be served until a different update file URL is provided. The new update file will also be added to the Downloadable Files section in the General tab.
Always save the product after updating the details to ensure the newly updated information is served to the customer.