
Navigate to My Account > Support to create and manage support tickets.
Endpoint: /my-account/customer-support/
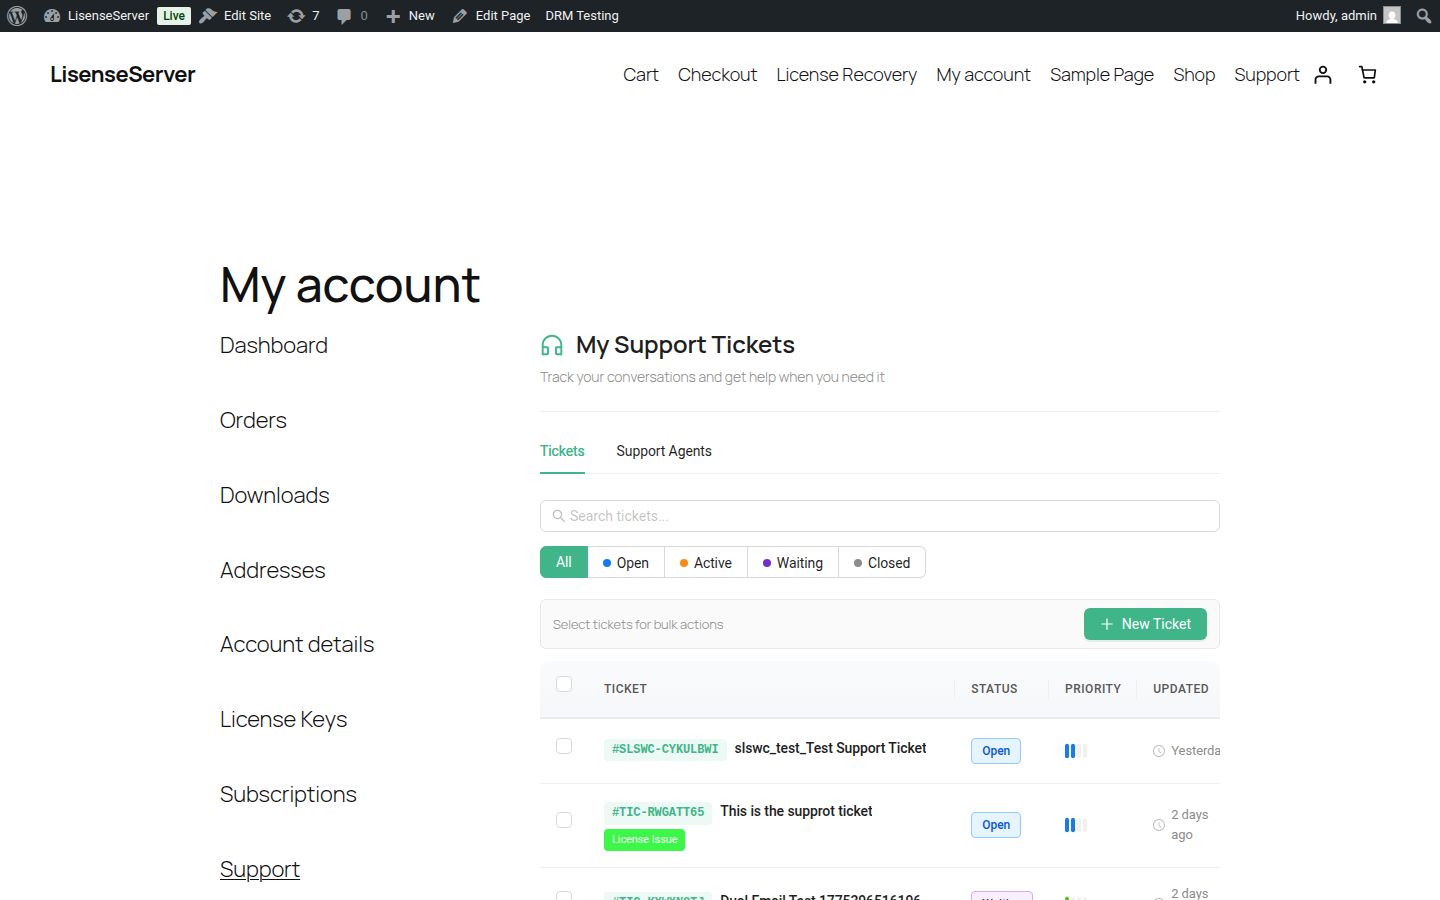
Ticket List
The default view shows all your support tickets in a table with:
- Subject and ticket number
- Status — Open, In Progress, Waiting, Resolved, or Closed
- Priority — Low, Normal, High, or Urgent
- Last updated date
Use the search bar to filter tickets by subject or content. You can also filter by status.
Creating a Ticket
- Click the Create button from the ticket list.
- Fill in the form:
- Subject — A brief summary of your issue (5-200 characters).
- Category — Select the most relevant category.
- Priority — Choose Low, Normal, High, or Urgent.
- License Key — Enter your 40-character license key if applicable. Depending on the store's configuration, this may be required.
- Description — Describe your issue in detail (20-5,000 characters). Include any error messages you have encountered.
- Attachments — Optionally attach files (screenshots, logs, etc.).
- Click Submit.
You will receive a response within 24 hours.
Viewing a Ticket
Click any ticket in the list to view the full conversation thread. From the detail view you can:
- Read all messages in the conversation
- Reply to the ticket with a new message
- Attach files to your reply
- See the current status and priority
Use the Back to Tickets button to return to the list.
Ticket Statuses
| Status | Meaning |
|---|---|
| Open | Ticket has been submitted and is awaiting a response |
| In Progress | A support agent is working on your issue |
| Waiting | The support team is waiting for your reply |
| Resolved | Your issue has been resolved |
| Closed | Ticket is closed and no further action is needed |
Support Agents
The Support Agents tab lets you grant third-party developers or agencies access to create and manage support tickets on your behalf.
Account Managers
An account manager has access to tickets for all your licenses. To add one:
- Go to the Support Agents tab.
- Click Add to All Licenses.
- Enter the agent's email address.
- Click Add to All Licenses to confirm.
Per-License Agents
You can also grant support access for a specific license only:
- Find the license in the per-license section.
- Click Add Agent on that license card.
- Enter the agent's email address.
- Click Add Agent to confirm.
Managing Agents
- Agents with a Pending invite status have not yet accepted. You can click Resend to send the invitation again.
- Click the delete button to remove an agent's access.
- To remove an account manager from all licenses at once, use the delete button on their row in the Account Managers section.
Deep Linking
Ticket detail links use the format #ticket-123 or ?ticket=123. Opening such a link takes you directly to that ticket's conversation.
Public Support Form
Store owners can add a public support form to any page using the Loading support form... shortcode. This allows visitors who are not logged in to submit a support request.
The public form collects:
- Name (2-100 characters)
- Email address
- Subject (5-200 characters)
- Category selection
- Message (20-5,000 characters)
After submission, a success message confirms the ticket was received. Visitors are encouraged to log in or register for an account to track their tickets and access full support features.